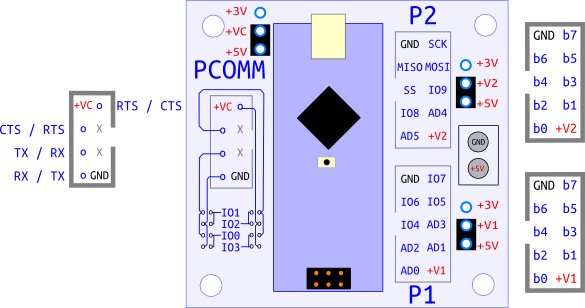
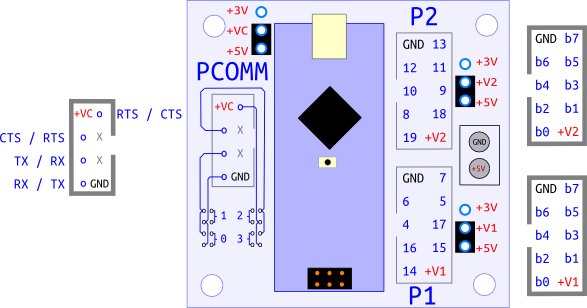
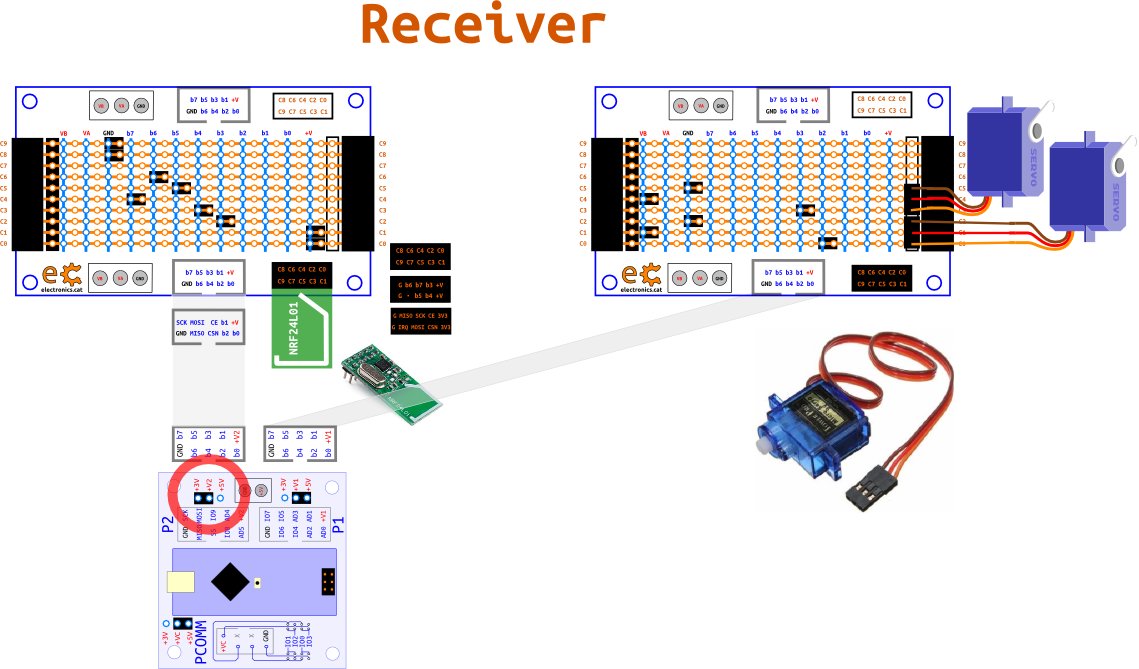
nano-eCat has three new
jumpers to select 5V or 3.3V as eCat bus supply voltage. This is
convenient because NRF24L01 should be powered at
3.3V. However their input/output pins are 5V tolerant.
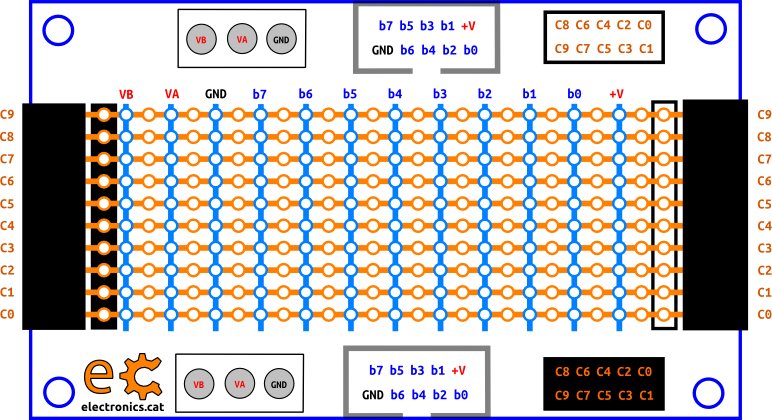
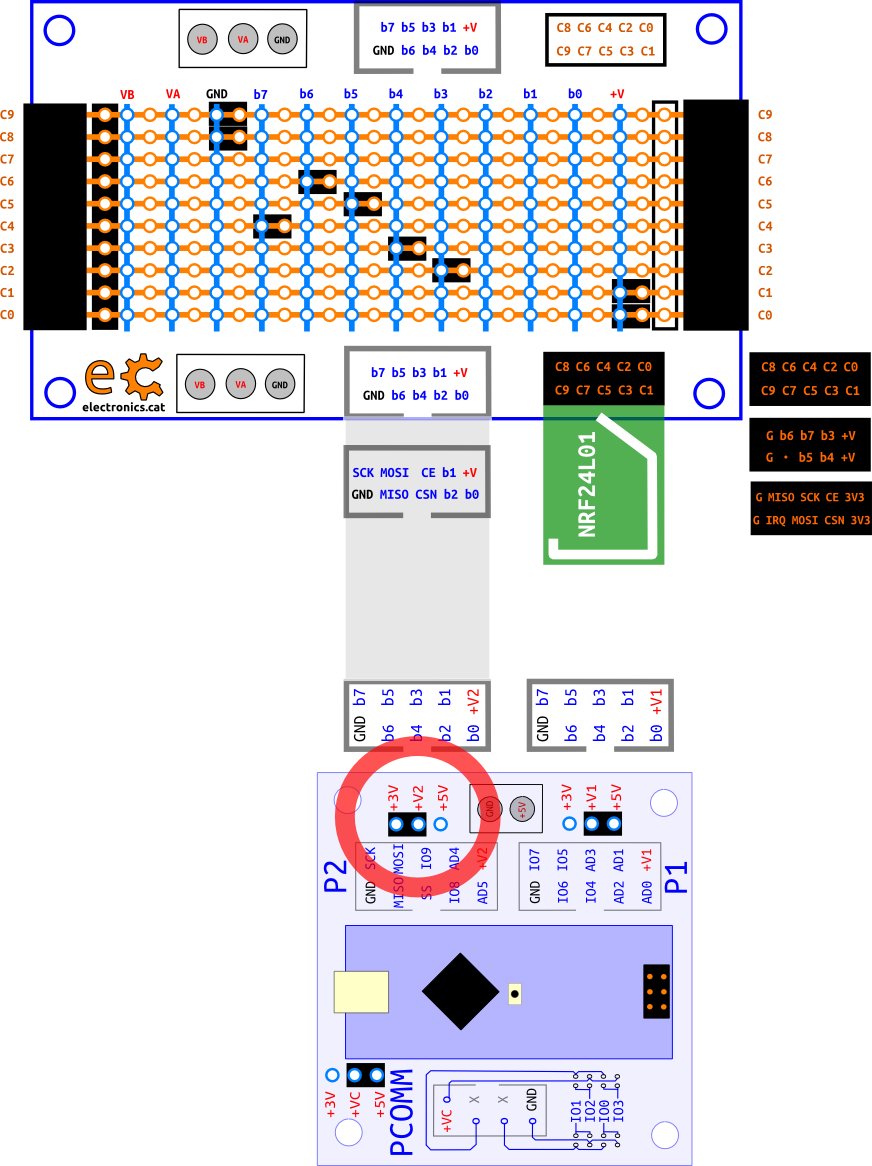
I/O matrix has two new
connectors 5x2 (female and male) able to customize any two rows
connector crossing matrix's rows and columns with jumpers :
I/O matrix and nano-eCat with proper jumpers
settings to connect Arduino Nano and NRF24L01. It can be replicated for
transmitter and receiver :
First trial to
test wireless communications is upload transmitter Arduino code rf24_01.ino and receiver Arduino
code rf24_02.ino. Transmitter should
be connected to computer through USB to be able to watch 57600 bauds
serial connection using minicom, gtkterm, qtTerm or similar. Receiver
can be powered remotely and its task is to pong messages sent by
transmitter. Established serial communication is checked through
computer's serial monitor plugged at the transmitter.
Once wireless
communications between Arduinos have been tested, it is time to add
funcionalities. Previous codes have been slightly modified to be able
to control two servos remotely using a joystick.
At the
transmitter side is added analog read from a two axis joystick and loop
function waits 100 milliseconds instead of 1 second :
unsigned long int
nAnalogValue2Degrees(unsigned long int nAnalogValue){ return
(nAnalogValue * 180) / 1023; }
void loop(void) {
... int analogPinX
= 0,analogPinY = 1;
unsigned long int deg[2];
deg[0] = nAnalogValue2Degrees(analogRead(analogPinX));
deg[1] = nAnalogValue2Degrees(analogRead(analogPinY)); printf("Now
sending x : %lu , y : %lu ...",deg[0],deg[1]);
bool ok = radio.write( deg, 2*sizeof(unsigned long) );
... delay(100);
... }
if (
radio.available() ){
unsigned long int deg[2];
bool done = false;
while (!done) {
// Fetch the payload, and see if this was the last one.
done = radio.read( deg, 2*sizeof(unsigned long)
);
// Write to servo
servo1.write(deg[0]);
servo2.write(deg[1]);
// Delay just a little bit to let the other unit
// make the transition to receiver
delay(20); } ...